
Working with Git (Beta)
This guide depends on the “Versions” feature currently in beta. Versions are free of charge during beta. Contact us at support@tinybird.co to activate the feature in your Workspace.
This guide will teach you how to connect your Tinybird Data Project with Git for a production-ready deployment workflow. The workflow follows the same patterns and best practices that you would use in any other software project.
This Git workflow uses Tinybird Environments.
Once your Tinybird Workspace and Data Project are connected through Git, any Pull Request (PR) submitted in your Git repository will create a preview release in Tinybird that is linked to the commit. Merging the PR will trigger deployment of changes to your Main Environment. This deployment will automatically run tests for syntax errors, run API Endpoint regressions, and run any data quality tests defined in the Data Project. If the tests pass, the changes can be merged.
Integrating your Workspace with Git
To integrate your Data Project with Git, you will need a Tinybird Workspace and a Git repository.
Initialize the Workspace from the command line by running tb init --git and follow the instructions in the command output.
Your Git repository will be synced to your Workspace; each Git commit that is merged will generate a new Tinybird release in the background.
Once you sync your Workspace with a Git repository (and protect your Main Environment), you can rely on your repository as the single source of truth for the resources in production. Tinybird will continue to keep track of the data and state.
$ tb init --git

** - /datasources already exists, skipping
** - /datasources/fixtures already exists, skipping
** - /endpoints already exists, skipping
** - /pipes already exists, skipping
** - /tests already exists, skipping
** - /scripts already exists, skipping
** - /deploy already exists, skipping
** - '.tinyenv' already exists, skipping
** - '.tinyb' already in .gitignore, skipping

** Initializing releases based on git for Workspace 'workspace'
** Checking diffs between remote Workspace and local. Hint: use 'tb diff' to check if your Data Project and Workspace synced
Pulling datasources  [####################################]  100%
Pulling pipes  [####################################]  100%
Pulling tokens  [####################################]  100%
** No diffs detected for 'workspace'

Do you want to generate CI/CD config files? [Y/n]: y
** List of available providers:
[1] GitHub
[2] GitLab
[0] Cancel

Use provider [1]: 1
** File .github/workflows/tinybird_ci.yml generated for CI/CD
** File .github/workflows/tinybird_cd.yml generated for CI/CD
** Warning: Set ADMIN_TOKEN in GitHub secrets. Use token associated to a user account, for instance admin user@tinybird.co. Hint: use `tb token copy b9b0f7cc-1f7c-4765-b73f-d77b2de74469` to copy clipboard
** GitHub CI/CD config files generated. Read this guide to learn how to run CI/CD pipelines: https://www.tinybird.co/docs/guides/continuous-integration.html
** Workspace 'workspace' release initialized to commit '019a9718b67a914bda8c2ac59a9368adf5d95b0b.'
Now start working with git, pushing changes to pull requests and let the CI/CD work for you. More details in this guide: https://www.tinybird.co/docs/guides/working-with-git.html.
You must save your user admin Auth Token associated with your account (admin user@domain) as a secret in your repository. For example, for GitHub, go to your repository Settings, and under Secrets and Variables / Actions, add the Auth Token’s value in a secret called ADMIN_TOKEN.
During the installation, we recommend pushing the Tinybird CI/CD actions to your Git provider. These actions are configurable .yml actions based on your development pipeline, and the templates we provide offer an excellent basis upon which to validate changes and deploy to Tinybird safely from Git. Those templates are being actively developed so we recommend you to use them directly or base yours on them so upgrading to newer versions is as straightforward as possible.
Once the process is completed, add the .tinyb to your .gitignore and remember to do a git push to be sure both Git and Tinybird are in sync.
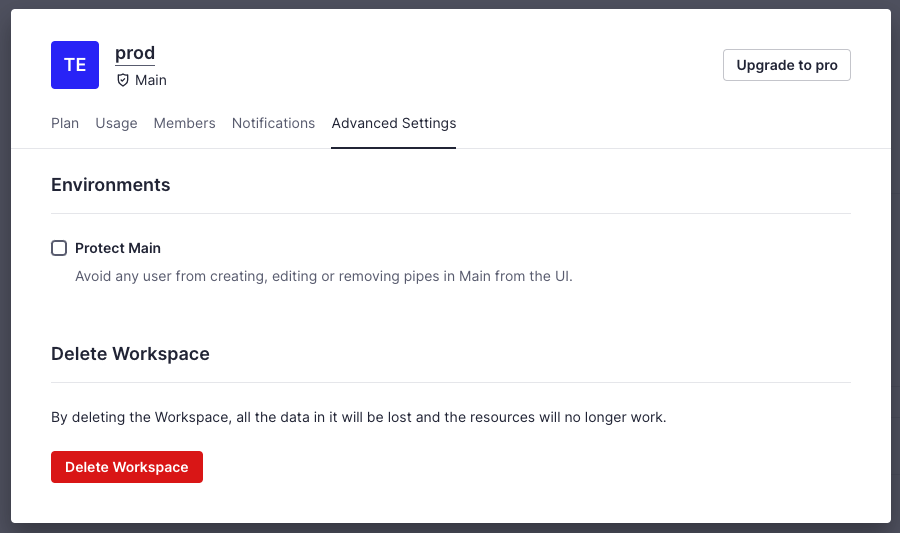
Protect your Main Environment
Once you decide to go the Git workflow, the Git repository and Data Project become your single source of truth and you want to keep your Main Environment protected so users can’t modify resources straight from the UI breaking the Git workflow.
Protect your Main Environment from your Workspace settings: Settings > Advanced Settings > Protect Main.
Making changes to your Data Project
Once your Data Project is synced with Git, we recommend protecting your Main Environment. When you protect your Main Environment it prevents members of the Workspace from creating, editing, or deleting resources directly from the Tinybird UI. This is critical for ensuring the repository and Data Project continue to serve as a single source of truth. Protection can be disabled at any time.
At this time it is still possible to use tb push from the CLI on a protected Main Environment, but we don’t recommend it.
Create a Git branch in your repository and work with Tinybird Datafiles to introduce the change you want: create a new Pipe, edit an Endpoint, change the sorting key of a Data Source, etc. For this purpose you use the strategies as defined in the Iterate guides.
Once your change is ready, create a Pull/Merge Request with the changes. The Tinybird CI pipeline will automatically generate an Environment with production data (by default, the last partition of all your Data Sources) and push all your changes to it. It will check that syntax is correct, that there are no regressions in your Endpoints, and run any data quality tests you have defined in the /tests folder using yaml.
The CI process can also be configured using labels depending on the type of change you want to introduce. For example, if you are editing a Pipe and you expect it to return fewer rows than the one currently in production, you can use the label --no-assert-result-rows-count in your PR so the CI doesn’t return an error.
Learn more about Continuous Integration in Tinybird.
Once your change is validated in the CI, it will be ready to be merged and deployed.
Deploying from Git
Once you are happy with the changes and the CI passes without errors, it’s time to deploy to production.
By default, the Continuous Deployment action runs a tb deploy that pushes only the files that have changed to the Main Environment. Depending on the type of change, you might need to do a more complex process and push things differently, for example, if you want to iterate a landing Data Source.
To allow these types of more complex changes or data migrations after the changes have been deployed, add the steps to a script with the following structure /deployment/${VERSION}/cd-deploy.sh (where version is the semver). The production push is similar to the test Environments, so we recommend using that same script in the CI to test that everything will work correctly.
Working with Versions
The current version of your Data Project is stored in the .tinyenv file created during the setup. When you start making more complex changes and defining the steps for deployment, you will need to increase the semver value in the .tinyenv file and creating a corresponding folder with the deployment instructions as stated above. For now, you must always remember to increase the version in each deployment. We are working on making this part of the process more intuitive.
Learn more about Continuous Deployment and deployment strategies in Tinybird to customize deployment to your Pull Request needs.
Experimenting in the UI with protection enabled
The UI is a great way to edit queries quickly and check the output. However, it is difficult to keep changes made in the UI synced with a Git repo. To allow for exploration without affecting production, you can use the Playground.

The Playground allows you to explore your production data without creating a new Pipe. If you want to bring one of your Playground explorations to Main, click the Download button at the top right of the screen and add the .pipe file to your Data Project, iterating as normal using your Git workflow.
Alternatively you can Drag and Drop a .pipe file to create a new Playgroun based on an existing one or Duplicate any existing Pipe from the UI to the Playground.